


|
Learn To
Finish Drywall From a Pro!
You wont find this information anywhere else!

Your Program Includes:
A 226-page eBook packed full of drywall trade
secrets: "The Trade Secrets to EASIER Taping,
Finishing and Texturing"
PLUS
Bonus Guide #1: "Sagging Ceilings - Can You Avoid the Tear-Out?"
Bonus Guide #2: "The Mud Swirl." A short 6-page how-to guide
for this popular type of texture.
Bonus #3:
Unlimited FREE Access to 17 On-The-Job Training Videos!
 |
|
|
How to Inspect a Hanging Job - and Other Tips On Hanging Drywall

The following tips on hanging drywall will show you exactly what to look for (or what to ask for) in a hanging job. Over the years Ive come across some simple techniques that have helped me to bid the jobs, and also to prepare them for taping. I like to call them the Rattle Test, and the Click Test.
First, make sure that any areas around
a tub/shower unit are hung with a waterresistant material. Usually, water-resistant drywall is a noticeably different color (Green or purple in most cases). Next, try the following simple tests: Rattle Test
The first thing I like to test for is drywall glue. Since I dont have x-ray vision I use an easy, fool-proof method: Make a firm fist and bump the drywall (in a pounding motion) at the location of the studs.
Wherever you see fasteners, theres a stud.
Listen while you pound.
What to listen for: Excessive rattling and board-slap. Board slap is the sound emitted when the drywall slaps against the studs when you bump it. This is proof that there is a gap between the drywall panels and the wall studs (on the back-side.) When the drywall panels are glued on, it always sounds solid.
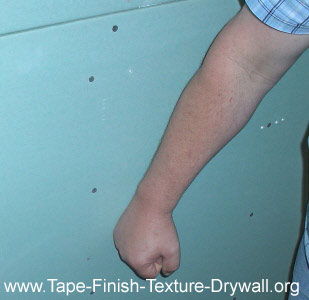
The first time that you hear (and feel) the difference between a glued-wall vs. a non-glued wall,
you will be foolproof! Bad hanging jobs rattle and slap. On the other hand, if enough fasteners are used BEFORE THE TAPING STARTS, then your drywall job will turn out fine either way.
Tips on hanging drywall#1: Notice the area where the walls meet the floor. If the drywall is actually resting on the floor, theres an increased chance that the panels are not completely against the wall studs (bad news!) For basement additions, the panels should be about ½-inch away from the floor.
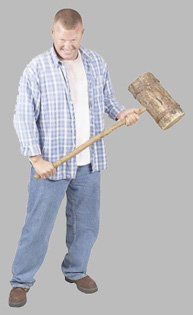
Tips on hanging drywall#2: I dont recommend pounding on someone elses finished walls: if the drywall panels arent tight, youll pop their nails and damage their joints and they might hit back!
If your drywall panels were not glued, the link called Sheetrock Nail Spacing (found at the bottom of this page) will show you how to effectively deal with it. Even if your walls are glued, youll still need to pay close attention to the fastener spacing on the inside corners and the butt joints. Click test
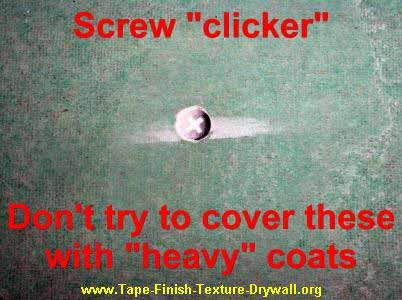
The next quick test requires a small joint knife (preferably a 6-inch). Hold the blade at a 45-degree angle to the wall and apply enough pressure to cause the blade to slightly bend. Next, drag it over all of the fasteners quickly (pull on the blade handle dont push). Any fastener heads that are protruding beyond the wall surface will cause a noticeable Click. Pay close attention to the inside corners and the butt joints where these clickers are most commonly found.
"Tips on hanging drywall#3: If youre finding quite a few clickers on every wall that you check, then chances are that the drywall hangers are not professional drywall hangers. This is exactly why its so important to request that drywall adhesive is used for hanging the drywall panels (onto wooden wall studs). You can see what a clicker looks like when its coated in the following photos.
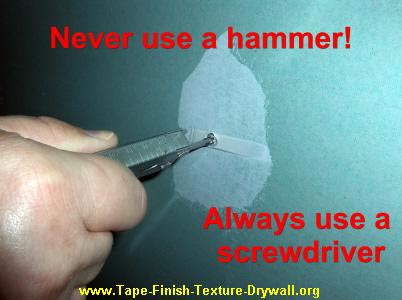
Tips on hanging drywall #4: Carry a Phillips screwdriver for tightening screws. Never use a hammer to sink a screw, even if youre in a hurry. Doing so will only break the screw-head off and damage the surrounding drywall. The Edge Inspection
The last part of the inspection involves paying close attention to the edges of the hung pieces. NOTE: The condition of the edges will directly affect the quality of the joints! This is commonly overlooked. Always take the time to trim the edges that are frayed with a super-sharp utility knife. Once you have clean-cut solid edges, you can build strong, invisible joints.
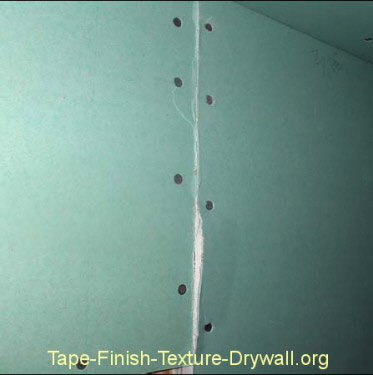
Before
(A butchered butt joint!)
Tips on hanging drywall #5: NO LOOSE PAPER ALLOWED! Get your utility knife and look for raised paper edges, especially on the butt joints, trim them off. Any fractures or broken areas should be checked for loose paper trim it off. Remember, loose paper is a blister waiting to happen.
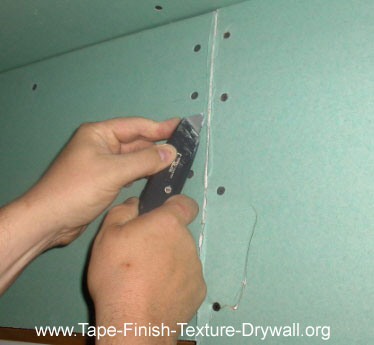
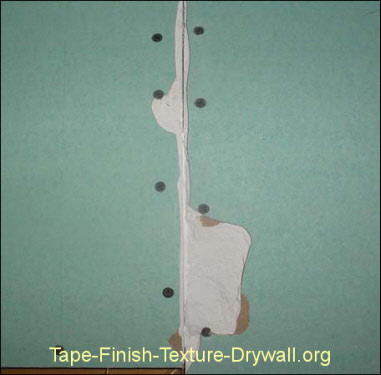 After
(Ready for mud and tape) 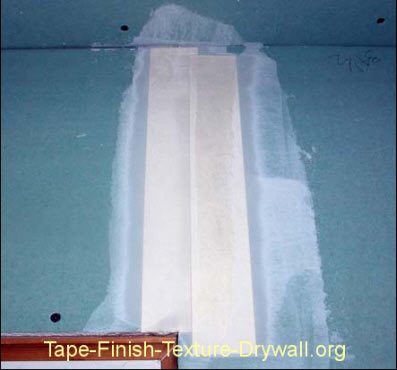 Taped
Tips on hanging drywall#6: Dont be afraid to cut the paper and remove the areas where the core material of the drywall is broken. Filling these areas in with fresh compound will yield higher-strength joints and a more solid wall. | |


