Home
Hole Repair
Hanging Tips
Sanding Drywall
Mudding Tips
Contact Us
Our Products
  

Learn To Finish Drywall From a Pro!


You won’t find this information anywhere else!


Your Program Includes:


A 226-page eBook packed full of drywall trade secrets: "The Trade Secrets to EASIER Taping, Finishing and Texturing"


PLUS


Bonus Guide #1: "Sagging Ceilings - Can You Avoid the Tear-Out?"


Bonus Guide #2: "The Mud Swirl." A short 6-page how-to guide for this popular type of texture.


Bonus #3: Unlimited FREE Access to 17 On-The-Job Training Videos!


More Info


Important Tips
On Hanging Drywall
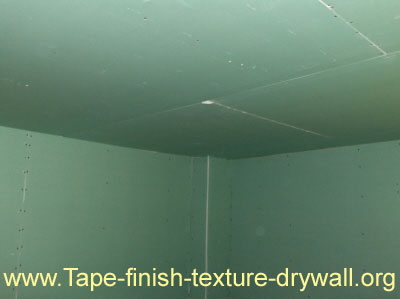
Tips on Hanging Drywall - Hung and Ready for Tape.

Although the main focus here is on drywall finishing and texturing, the following tips on hanging drywall will prove to be invaluable. They cover the most commonly misunderstood parts of the drywall hanging stage.

If you want to build solid walls that will last forever and continue to look great – then you’ll need to make them solid in the hanging stage. Think of the taping & finishing stage as nothing more than cosmetic.

Taping the joints and coating them with joint compound does add strength to the wall, but you can’t rely on this alone to remedy "loose" drywall panels.

Many people apply joint tape over loose drywall panels and smashed, frayed edges - thinking that the joint tape will remedy the problem.

Then when the joints begin to show and the nails/screws "pop", they usually assume that there’s some sort of a scientific or technical cause for the problems. In most cases, the real culprit is just negligence of the basics.

Skim through these pages and you’ll understand why the professional never has problems with multiple nail pops, tub / shower units that just keep cracking at the wall, and the many other problems that are so common for the novice.

Drywall Nails VS Screws

Drywall screws are superior to nails in many ways:
  • Screws are easier to finish-off with joint compound.

  • Screws are easier on the framework (no impact or vibration), and easier on the drywall (less damage to the surrounding material). This means far better holding power than that of a nail.

Always use screws (not nails) in the field area of the panels because they are much, much easier to finish with joint compound.

Professional hangers will use both. For instance: If you’re preparing to hang a panel on the upper wall area, nails can be pre-tacked along the top-edge of the panel so that you can start hammering with one hand, while you hold the sheet in place with the other.

In this case the nails are only used for getting the sheet in place, and then the screws are used to finish off the middle area or "field" of each panel.


Related Articles:

Tips on Installing Drywall - Walls
Tips on installing drywall that reveal how to build walls that will remain 99%free of nail pops! Learn the fool-proof way to drywall outside corners.

How to Hang Wallboard - Ceilings
Learn how to hang wallboard ceilings that NEVER SAG! Now you can install ceiling sheetrock the EASY way!

Tips on Installing Drywall - Butt Joints
Great tips on installing drywall can "make" or "break" your remodeling project! If you don't build the joints correctly, then all the mud and tape in the world won't save you!

Tips On Hanging Drywall - Inspection
How to inspect a hanging job and other tips on hanging drywall. Can you tell the difference between a good hanging job and a BAD one? Do you know what to look for, or what to ask for in a hanging job?

Bathroom Walls Sheetrock
Install a new tub/shower unit that NEVER CRACKS at the wall! Bathroom walls sheetrock tips for permanently fixing a tub/shower that just keeps cracking!

Sheetrock Nail Spacing
Proper sheetrock nail spacing is the key to preventing loose drywall panels, weak joints, multiple nail pops, and other on-going problems.

Tips on Installing Drywall - Definitions
The following definitions and tips on installing drywall will help to speed your learning.


Page copy protected against web site content infringement by Copyscape

© Jeff Croft