Drywall Mudding Tips:
Working with Setting-Type
Joint Compound
Large & Medium Size Batches
Large Batch
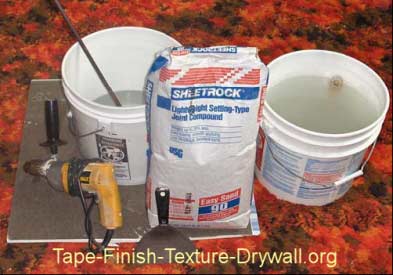
The following drywall mudding tips cover the mixing and cleanup of setting - type compound. Information on how to apply the compound and tape is found in the Trade Secrets Course.
Because of the dust that comes from dumping the
powder into the bucket, you may want
to do this part outside.
Drywall Mudding Tips #1: As a general rule - When working with large batches, ALWAYS mix a little more material than you need. The only alternative to wasting a little of each batch is this:
Dont mix enough! That way you get to wash your pan, knives, paddle, and bucket-so that you can mix another small batch - and then do it all over again! Bad plan! Personally, Id rather waste a little compound than waste my time.
Drywall Mudding Tips #2: When mixing a full batch in a bucket, ALWAYS start with water in the bucket, and then add the powder. Never start with the powder in the bucket first, or youll end up with a LUMPY mess. One bag of lightweight powder makes just over half a bucket of compound. "Soak Point" or "Breakdown"
Setting-type compound tends to go through a rapid change in consistency approximately 60 seconds after it has made contact with water. In other words, the compound reaches the "soak point". Certain brands will suddenly become "shiny" and instantly "too thin". Some pros call this "break-down".
TO MIX ONE FULL 18 POUND BAG YOU WILL NEED:
* 3 empty drywall buckets:
One bucket filled at least 3/4 full with clean water. This is your water bucket which is standard for ANY part of the taping/finishing job. Always have it ready when youre using setting-type. Throw in your scrub-brush, youll need it.
* One drywall bucket filled with just under 4-inches of water:
This happens to be about the same height as the top fin on my mixing paddle. This is a good amount to start with for 1 whole bag of LIGHTWEIGHT powder. *
One empty drywall bucket for sitting on.
* Respirator
* 18-pound bag LIGHTWEIGHT setting-type 90.
* Pan & knives ready
* Power-mixer: (variable-speed drill motor & paddle).
Step 1: Put on the respirator. Cut open the top of the bag.
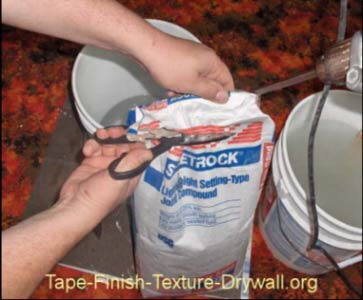
Step 2: While keeping the mixer/paddle in the bucket, grasp the open bag of powder and dump it in.
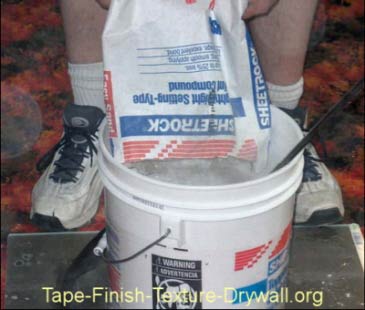
Step 3: HOLD THE DRILL MOTOR FIRMLY AND BE READY FOR A FIGHT! While holding the bucket firmly with your feet, start mixing slowly until you feel the mud thicken. The goal for the mud at this point is
a little too thick
If you did this right, your paddle will eventually come to a screeching halt. This is intentional and it only means that youll need to add a small amount of water to the mix to create a workable blend. This outcome is better than having too much water in your bucket, which means that the result is "soupy" and you end up adding more powder.
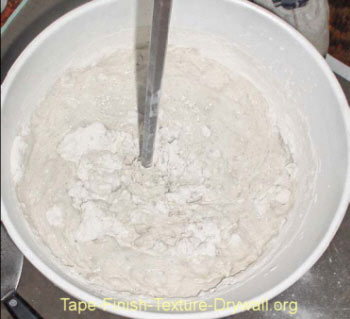
After the paddle bogs down in the thick mix, youll need to start adding dashes (about 1-cup) of water and work the paddle up and down (drill motor off). Then, try again- slowly.
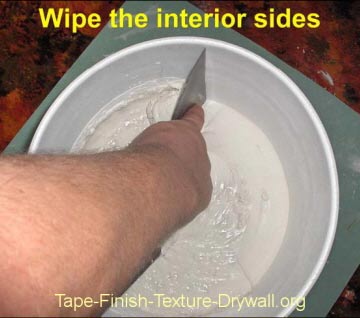
Step 4: After some blending, use your 6-inch blade to wipe the half-mixed material off of the inner-sides of the bucket. Using your power mixer, mix this through also.
Drywall Mudding Tips #3: Wait about 1 minute or so for the compound to reach the "soak point". If the mud is too "thin" or "runny", youll have to add more powder.
Step 5: ALWAYS clean the mixing paddle - BEFORE you start applying the fresh compound. If youre using the recommended type of paddle, try the following technique:
Drywall Mudding Tips #4:
How to Clean-Off a Mixing Paddle - FAST!Remove the prop from the drill motor. Grasp the shaft-end firmly and place the muddy paddle-end under the water in your water bucket. Maintain contact between the prop-fins and the inner "SIDE" of the bucket. This keeps the paddle from banging all over the inside of the bucket during the next step.
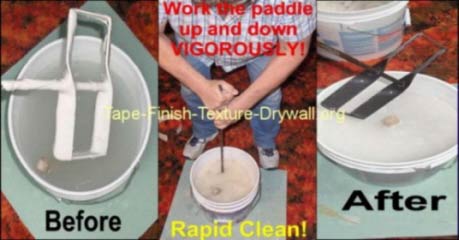
Without allowing the paddle to emerge from the surface of the water, VIGOROUSLY work the shaft up and down like a "madman", about 10-15 times. If you did it hard enough, itll come out clean!
This works like a charm and its super-fast. Be sure that theres NO compound remaining on the prop. Even small amounts of hard material can break-off during mixing and contaminate future batches.
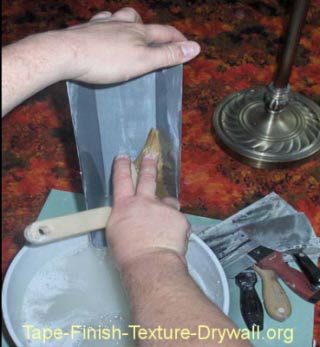
After applying the batch, ALWAYS wash all tools and the bucket before starting a new batch. Wash the pan first then the blades & bucket. Never allow the compound to set-up or dry on your equipment.
Drywall Mudding Tips #5:Medium Batch (1/2 bag)
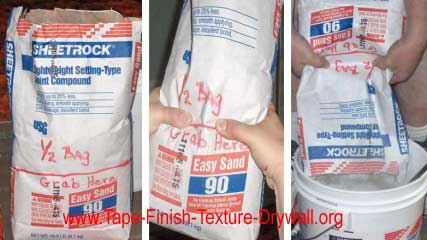
For ½ - bag batches, just use half the amount of water with the following slight change in directions:
When you grasp the bag to dump it, place your thumbs and forefingers at the halfway level on the bag and squeeze firmly when you tip the bag over. This only allows 1/2 of the bag to come out.
 | 


