Most Commonly Used For:
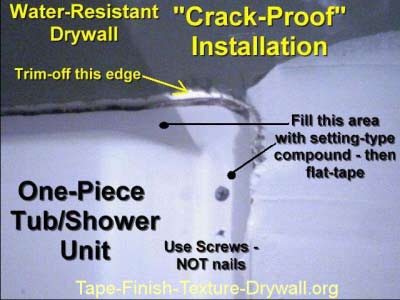
- New Construction: Pre-filling the flange area around a new tub/shower unit (as shown below).
- First coat on outside corner bead. This is optional.
- Rush jobs that require multiple coats on the same day.
- Plaster repair
- Repairs - large and/or "deep".
- Work areas that are notorious for slow drying due to poor temperatures or excess moisture / humidity.

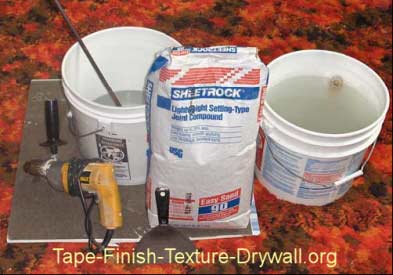
Setting-Type" means that it dries more quickly as a result of a chemical reaction which starts when you add the water. Most "Lightweight" versions are formulated for easy sanding.
IMPORTANT DIY Drywall Finishing Tip:
In most cases the "Regular" version of "Setting-Type" joint compound is almost impossible to sand!
When choosing a brand, look for "easy-sand"
in the product's description.
"Setting-Type" compound is commonly available in 20 45 90 minute formulas. These numbers refer to the approximate amount of time required for the compound to "set" after it makes contact with the water. I recommend the 90 minute formula. Its a good all-around choice and its the easiest to use.
Should a DIY drywall finisher use the setting type for everything? NO! Whenever possible, stick with ordinary all-purpose. Dont use setting-type unless you have to.
If your project does NOT involve a tub/shower installation, or deep plaster repairs, then all-purpose ready-mix joint compound is all you really need for DIY drywall finishing.
For advanced DIY drywall finishers that are in a hurry, setting-type is the way to go. However, keep in mind that on larger jobs you can often times complete the project just as quickly by using ordinary joint compound.
"CONSISTENCY" OF THE COMPOUND
Since we are using setting-type compound mainly for bed coats and pre-filling around new tub/shower units, theres no need to be as concerned about the "exact" consistency of the compound (otherwise referred to as water-to-mud ratio).
Keep in mind however, that if youre using setting-type for the 1st coat over mesh tape,
do not apply the compound if its too thick.
This is a good way to build a "hollow" joint - which happens more often with the setting-type than it does with the ready-mix! The mesh tape acts as a "bridge" and the compound "shells" over the joint.
For this reason, if the compound starts to set-up, stop applying it to the mesh and mix a new batch. Keep in mind that setting-type compound is "resistant" to shrinkage. IT DOES NOT HAVE TO BE MIXED AS THICK AS PEANUT-BUTTER TO RESIST SHRINKAGE.
Important Advantages to Using Setting-Type Compound:
- Setting-type resists "shrinkage".
- Setting-type resists bubbling: Ordinary compound tends to bubble like crazy when applied over damp surfaces, painted plaster, or painted drywall. Setting-type is less likely to, or at least bubbles "less-than" the ready- mix joint compound.
- Using setting-type allows you to apply multiple coats - on the same day.
DIY Drywall Finishing:
Applying Multiple Coats Same Day
When setting-type compound reaches the point in time where it "sets-up", or "hardens", it is not completely dry. It still contains a great deal of moisture. In other words, its still "damp". This makes the material impossible to sand, yet you can still coat over it (but only with more setting-type compound).
The rules for applying multiple coats
on the same day:
#1 Always use setting-type for each additional coat. Dont try to use ordinary compound over the "damp" setting-type, or youll get MAJOR bubbling. If the setting-type is DRY, regular compound works fine for the next coat.
#2 For painted surfaces & plaster: Setting type compound tends to take longer to "set" when applied over paint and plaster. This means that if you try to apply your second coats too quickly, youll notice that the first coat will pull loose or peel away at the edges. To remedy this, maintain good temperature and ventilation, and allow a little more drying time between coats.
#3 Dont plan on being able to use sandpaper on the areas until the next day - or at least until the compound is COMPLETELY dry.


