

|
Bathroom Walls Sheetrock: Install a New Tub/Shower Unit that will NEVER CRACK at the Wall!The following bathroom walls sheetrock tips will show you how to install a new bathtub/shower unit correctly, and also how to permanently fix one that just keeps cracking. NEW CONSTRUCTION: When tub/shower units and the surrounding drywall are improperly installed, its very common to see cracking where the wall meets the tub/surround. You can caulk it all you want, but it just keeps cracking and the caulk just wont cure it. The result is an ugly build-up of old caulking from repeated attempts to solve the problem.
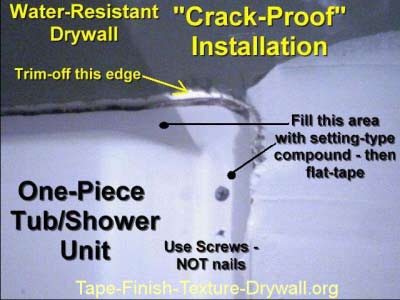
The two most common causes are: #1 Using the wrong fasteners to install the tub/shower unit: #2 Most people place the drywall over-top of the flange on the tub/surround unit: Fiberglass bathtubs and surrounds are very flexible and tend to move (especially with a two or three hundred pound person inside). Needless to say, the bathroom walls sheetrock needs to be as solid and resistant to movement as possible.
The only way to accomplish this is to have the bathroom walls sheetrock tightly fastened to the studs, and the filler tightly bonded to the flange! Even the latest books available on taping/finishing show the incorrect installation of the bathroom walls sheetrock around the flange! Always use setting-type compound to pre-fill the flange area. Afterwards, apply a single strip of un-folded mesh tape over the filled area along the entire length of the flange.
Some people like to use the paper joint tape here, but the mesh tape is often preferred because its a water-resistant material. Also, be sure to use a water proof, or water-resistant drywall around tubs/showers. TIP: When choosing drywall pieces to hang around the tub/surround, never place a recessed edge up next to this void. Doing so will only make filling and taping much more difficult. Refer to The Trade Secrets to EASIER Taping, Finishing and Texturing for detailed instructions on taping and finishing this and all other parts of the job. |


